Tutorial: Creating a Custom Module in CRUDBooster
In this tutorial, I will guide you through the process of creating a custom module in CRUDBooster. We will discuss why and when you might need to create a custom module, as well as how to integrate it with CRUDBooster's Authorization and Permission system.
By default, CRUDBooster provides a powerful CRUD generator that helps developers create admin panels quickly. However, in some cases, you may need a more customized approach that goes beyond the standard module generator. This is where custom modules come into play. With a custom module, you can design unique workflows, tailor the UI/UX to your needs, and extend CRUDBooster’s functionality while still utilizing its robust authentication and authorization features.
Let’s dive into the step-by-step process of building a custom module.
This tutorial is based on the official documentation: https://crudbooster.com/docs#/?id=custom-module
Prerequisites
CRUDBooster v7.x installed on your Laravel project.
Basic knowledge of Livewire & Laravel (https://livewire.laravel.com/)
1. Understanding the Module Folder Structure
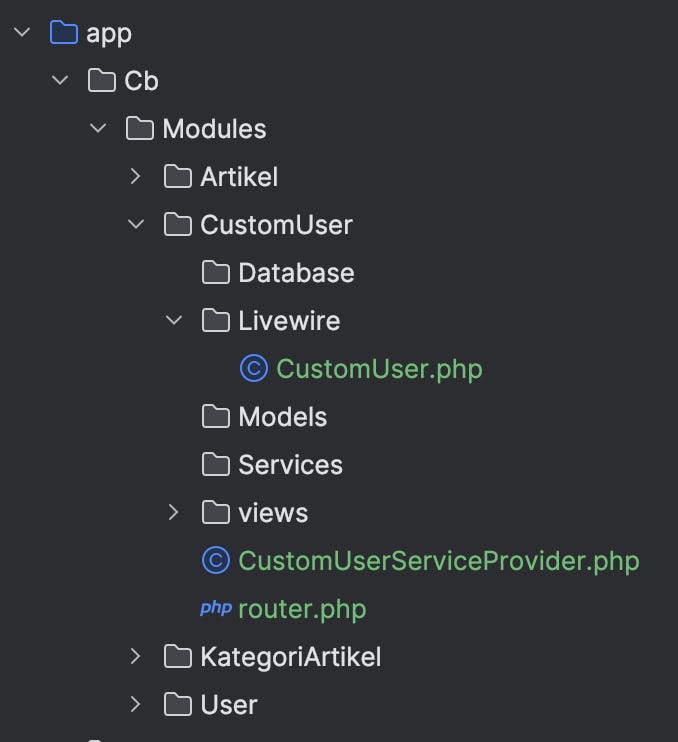
Before we start coding, let's understand the structure of a CRUDBooster module. Here’s what a module folder looks like:
/app/Cb/Modules/YourModuleName

YourModuleName
|
--- Database
------ Migrations
--------- file_name_migration.php
--- Livewire
------ Name.php
--- Models
------ Name.php
--- Services
------ NameService.php
--- views
--- ModuleServiceProvider.php
--- router.php
Modules should be placed inside /app/Cb/Modules/{moduleName}. The folder consists of:
Database: Stores migration files.
Livewire: Contains Livewire components.
Models: Houses Eloquent models.
Services: Used for advanced query handling.
Views: Contains Blade templates.
ModuleServiceProvider: Registers the module.
router.php: Defines custom routes.
Having a well-structured module ensures better maintainability and scalability in your Laravel application.
Let’s collaborate on this. Follow me as I create a folder named /app/Cb/Modules/CustomUser. Inside this folder, we’ll create another directory with the same structure as mentioned above.
2, Creating the Livewire Component
Please create a file named “CustomUser.php” in the folder “Livewire.” Then, follow the code below:
<?php

namespace App\Cb\Modules\CustomUser\Livewire;

use App\Cb\Modules\User\Models\User;
use Illuminate\Support\Facades\Gate;
use Livewire\Component;

class CustomUser extends Component
{
    public function mount()
    {

    }

    public function render()
    {
        return view('cb.modules.customuser::index')
            ->layout("cb.themes::layout-app");
    }

}
We need to extend the view with the layout from CRUDBooster, using the layout name “cb.themes::layout-app”.
3. Creating the View
Create a file view name “index.blade.php” in the views folder
<div x-data="customUser()">

</div>
<script>
    function customUser()
    {

    }
</script>
This is a default template provided by Livewire’s standard library.
4. Creating the Service Provider
Each module requires a Service Provider to register itself with CRUDBooster. This acts as the module's entry point, ensuring it integrates seamlessly with the system. Here’s an example:
File: /app/Cb/Modules/CustomUser/CustomUserServiceProvider.php
<?php

namespace App\Cb\Modules\CustomUser;

use App\Cb\Modules\CustomUser\Livewire\CustomUser;
use CrudBooster\Modules\ModuleRegistrar;
use CrudBooster\Modules\Role\Enum\RolePermission;
use Illuminate\Support\ServiceProvider;
use Livewire\Livewire;

class CustomUserServiceProvider extends ServiceProvider
{
    public function boot()
    {
        $this->loadViewsFrom(__DIR__.'/views', 'cb.modules.customuser');
        $this->loadRoutesFrom(__DIR__ . '/router.php');

        Livewire::component('custom-user', CustomUser::class);
        ModuleRegistrar::registerModule(
            key: 'custom-user',
            name: 'Custom',
            browseModuleClass: CustomUser::class,
            formModuleClass: CustomUser::class,
            serviceProvider: self::class,
            additional: [
                'permissionAvailable' => [
                    RolePermission::READ,
                ],
            ]
        );
    }
}
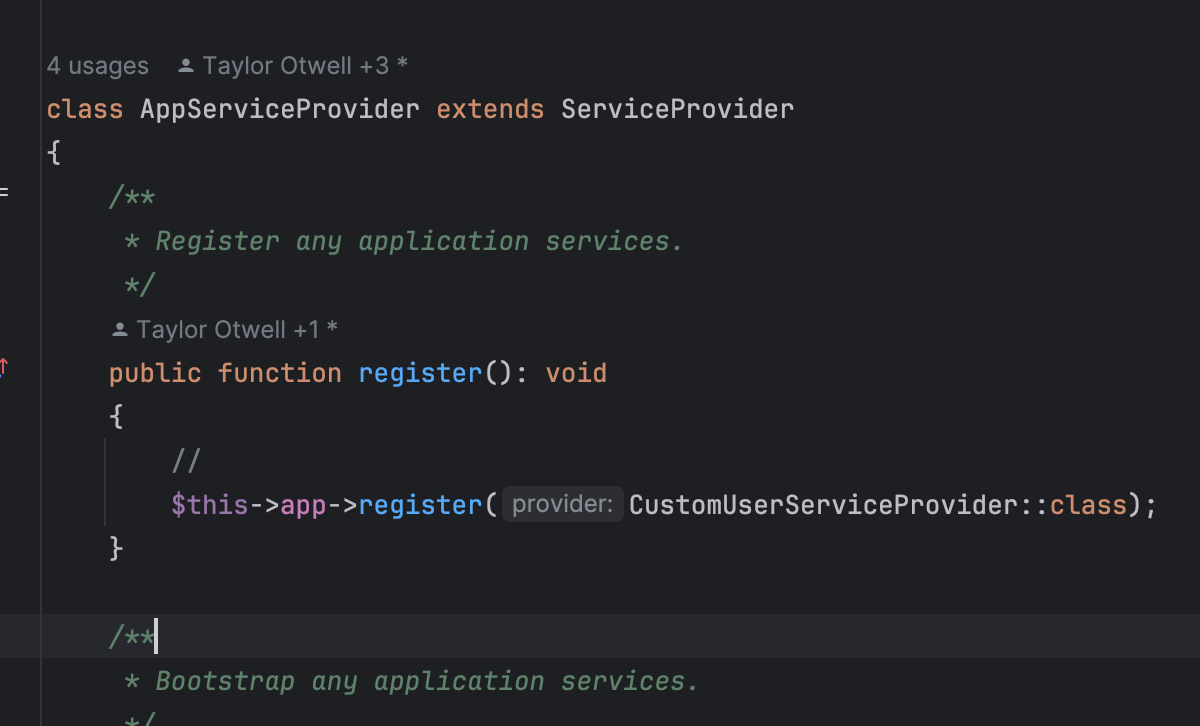
Next, register this service provider in Laravel’s default AppServiceProvider.php:
at register method:
$this->app->register(CustomUserServiceProvider::class);5. Defining Custom Routes
Modules often require custom routes to handle their operations. Inside router.php, define your module’s route:
<?php
\CrudBooster\Helpers\CBRoute::createRouteOne("custom-user", \App\Cb\Modules\CustomUser\Livewire\CustomUser::class);
This ensures that the module is accessible via the /cms/custom-user URL.
6. Initial Testing
After following the steps above, you can test your module by navigating to:
https://localhost:8000/cms/custom-user
Ensure your Laravel development server is running (
php artisan serve).
If everything is set up correctly, you should see your module’s page load without issues.
7. Enhancing the View & Component Class
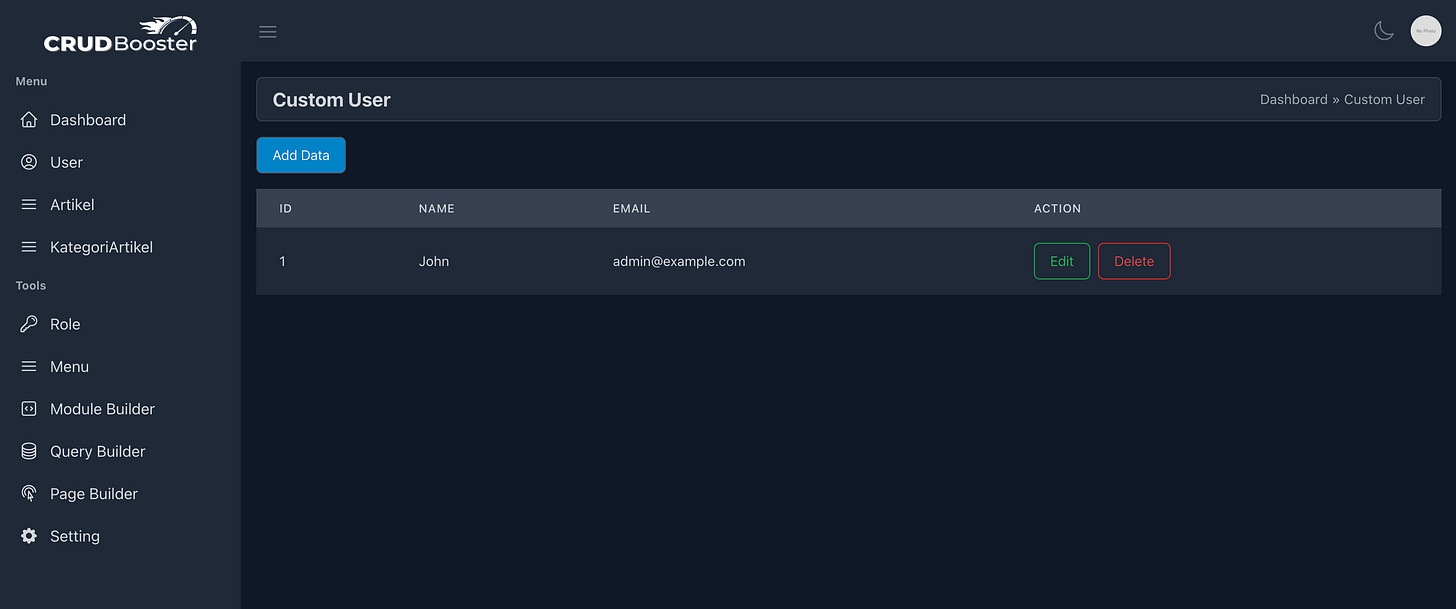
Now, let’s add some structure to the UI. We will create a simple table displaying user data:
Component Class (app/Cb/Modules/CustomUser/Livewire/CustomUser.php)
<?php

namespace App\Cb\Modules\CustomUser\Livewire;

use App\Cb\Modules\User\Models\User;
use Illuminate\Support\Facades\Gate;
use Livewire\Component;

class CustomUser extends Component
{
    public function mount()
    {

    }

    public function render()
    {
        return view('cb.modules.customuser::index',[
            'users'=> User::all()
        ])
            ->layout("cb.themes::layout-app");
    }

}
View (app/Cb/Modules/CustomUser/views/index.blade.php)
<div x-data="customUser()">
    <div class="mb-4">
        <x-header pageTitle="Custom User"/>
    </div>

    <div class="flex justify-start mb-4">
        <a href="javascript:" class="btn btn-primary">Add Data</a>
    </div>

    <table class="table">
        <thead>
            <tr>
                <th>ID</th>
                <th>Name</th>
                <th>Email</th>
                <th>Action</th>
            </tr>
        </thead>
        <tbody>
            @foreach($users as $user)
            <tr>
                <td>{{$user->id}}</td>
                <td>{{$user->name}}</td>
                <td>{{$user->email}}</td>
                <td class="flex justify-start gap-2">
                    <a href="#" class="btn btn-outline-success">Edit</a>
                    <a href="#" class="btn btn-outline-danger">Delete</a>
                </td>
            </tr>
            @endforeach
        </tbody>
    </table>
</div>
<script>
    function customUser() {}
</script>
8. Adding Permissions and Security
For security, always check user permissions before allowing actions. You can enforce access control using Blade directives:
@can(“{permission}”,”{module-key}”)
@can('create', 'customer-user')
  <a href="javascript:" class="btn btn-primary">Add Data</a>
@endcan
Or, inside a controller:
use Illuminate\Support\Facades\Gate;

Gate::check(‘{permission}’, ‘{module-key}’);
Example:
if (!Gate::check('create', 'customer-user')) {
    abort(403);
}
Permission available: create, read, update, delete, is_super_admin
9. Adding a Custom CSS & JS
If you want to add a custom CSS, you can embed your CSS file in crudbooster. To do this, use the following function and send it to the service provider. In this context, the service provider is CustomUserServiceProvider, and you should call it in the boot method:
// Register custom css
CbThemeAssetRegistrar::addCss(asset('css/custom-user-style.css'));
Full version:
<?php

namespace App\Cb\Modules\CustomUser;

use App\Cb\Modules\CustomUser\Livewire\CustomUser;
use CrudBooster\Modules\ModuleRegistrar;
use CrudBooster\Modules\Role\Enum\RolePermission;
use CrudBooster\Themes\CbThemeAssetRegistrar;
use Illuminate\Support\ServiceProvider;
use Livewire\Livewire;

class CustomUserServiceProvider extends ServiceProvider
{
    public function boot()
    {
        $this->loadViewsFrom(__DIR__.'/views', 'cb.modules.customuser');
        $this->loadRoutesFrom(__DIR__ . '/router.php');

        Livewire::component('custom-user', CustomUser::class);
        ModuleRegistrar::registerModule(
            key: 'custom-user',
            name: 'Custom',
            browseModuleClass: CustomUser::class,
            formModuleClass: CustomUser::class,
            serviceProvider: self::class,
            additional: [
                'permissionAvailable' => [
                    RolePermission::READ,
                ],
        ]);

        // Register custom css
        CbThemeAssetRegistrar::addCss(asset('css/custom-user-style.css'));
    }
}
Now, if you want to add JavaScript, the process is similar to adding CSS, but the functions you can use are different.
// Register custom js
CbThemeAssetRegistrar::addJs(asset('js/custom-user-script.js'));
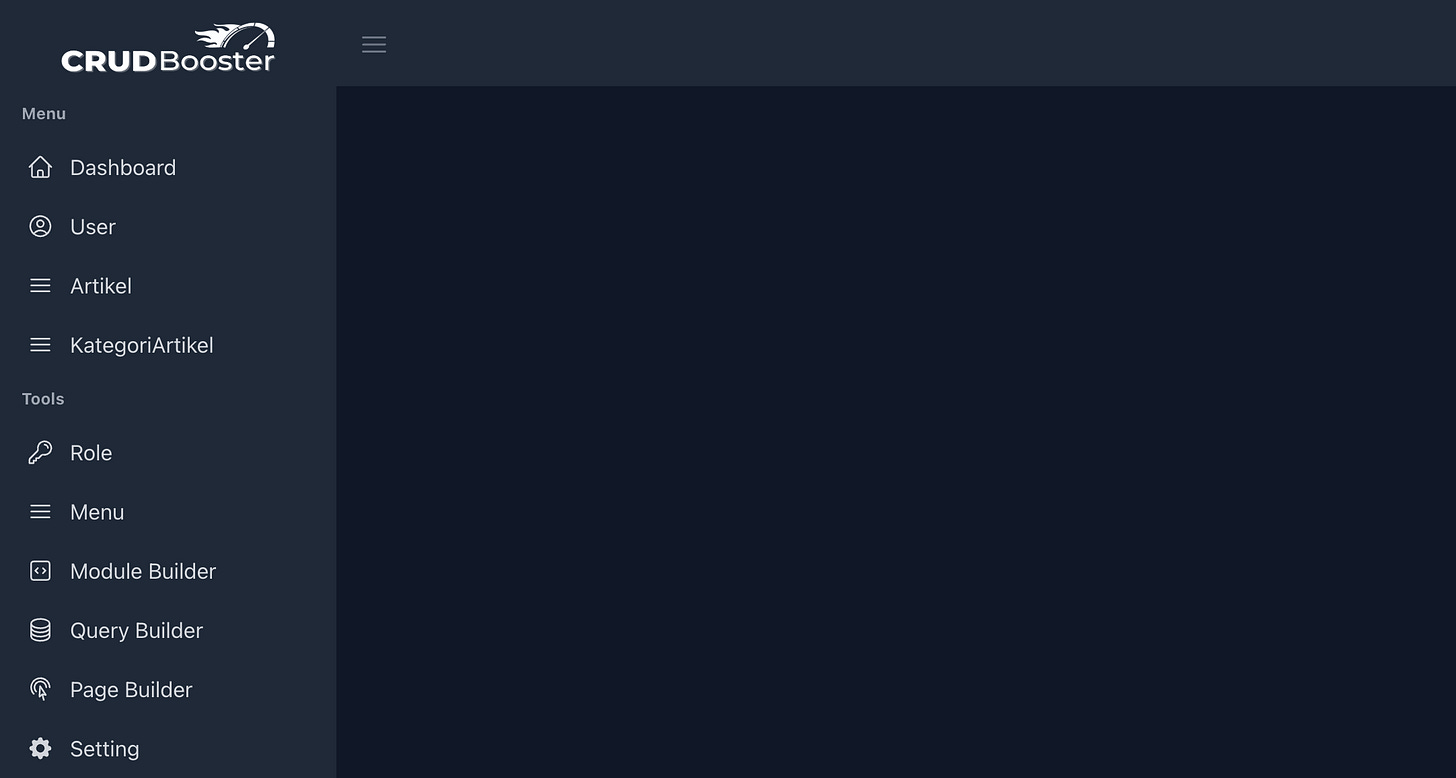
10. Add to Menu
Once you have successfully created the module, it's time to add it to the menu for easy access. Follow these steps:
Go to the Menu Management section.
Click "Add Menu Management".
Fill out the form, select CRUD Module as the type, and choose the Custom module from the list. (This is the module you just created, and it should now appear in the list.)
Click "Save" to apply the changes.
Conclusion
By following this guide, you have successfully built a custom module in CRUDBooster. This allows you to extend the core functionality while maintaining security and flexibility. You can now:
✅ Create custom Livewire components.
✅ Register and configure modules via a service provider.
✅ Define custom routes and manage views.
✅ Secure your module with CRUDBooster’s built-in permission system.
Start building your own modules today and take your Laravel admin panel to the next level! 🚀 Download CRUDBooster now!


